Note Events and Registers displayed on this help page will be different to what you will see in your system.
Using a Mobile Device
When logging into you TriLine GRC using the usual link, you will always be presented with the mobile version of the Portal login page.
Once logged in the user can either record your new Register and Events record entries in this mobile friendly portal, or the user can choose to click through to the Main Website (full browser version) of TriLine GRC. In this case, Portal users will see the web version of the Portal, and TriLine GRC position users will see the web version of TriLine GRC. The user will need to logout and log back in to return to the mobile version.
The Mobile Portal does not contain a Document Library section. Click the Main Website link to access the Document Library.
The Mobile Portal does not have a Portal self register facility, meaning you must already have a login to TriLine GRC to use it.
For all other features such as adding additional notes and attachments, click the Main Website link.
Procedures
Logging in on a Mobile Device
Open a new tab on the Internet browser on your Mobile Device.
Single Sign On Clients
Enter your TriLine GRC URL into your browser (or add the link to your favourites and click that).
Your credentials will be verified and you will automatically be logged in and the Mobile Portal page is displayed.
TriLine GRC Login
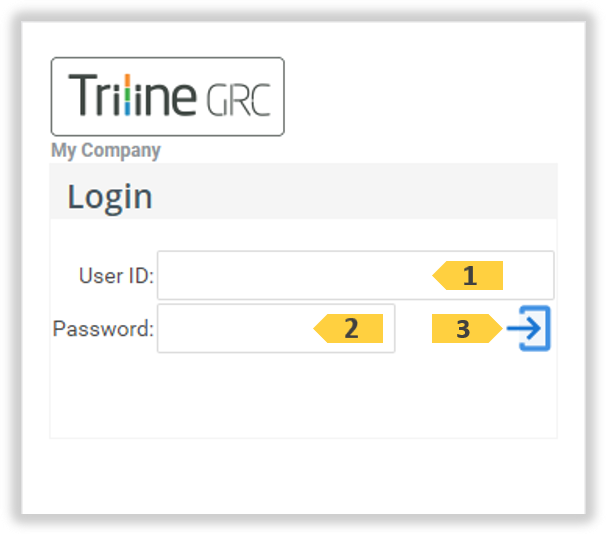
Enter your TriLine GRC URL into your browser (or add the link to your favourites and click that). The Mobile login screen will appear.
Enter your TriLine GRC or Portal User ID in the User ID field 1, press tab,
Enter your TriLine GRC or Portal Password in the Password field 2,
Press Enter or , or click the Login icon 3. If your credentials are correct, you will be logged in and the Mobile Portal page is displayed.
Either:
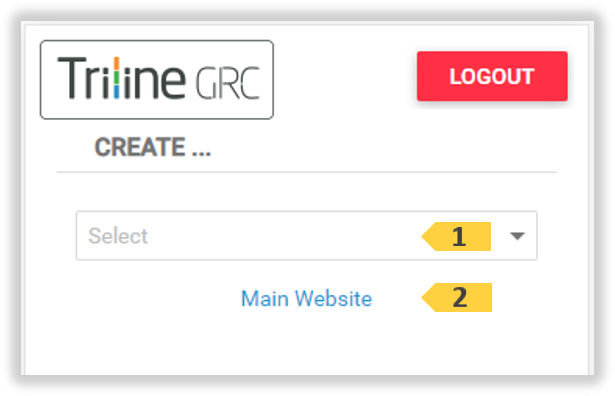
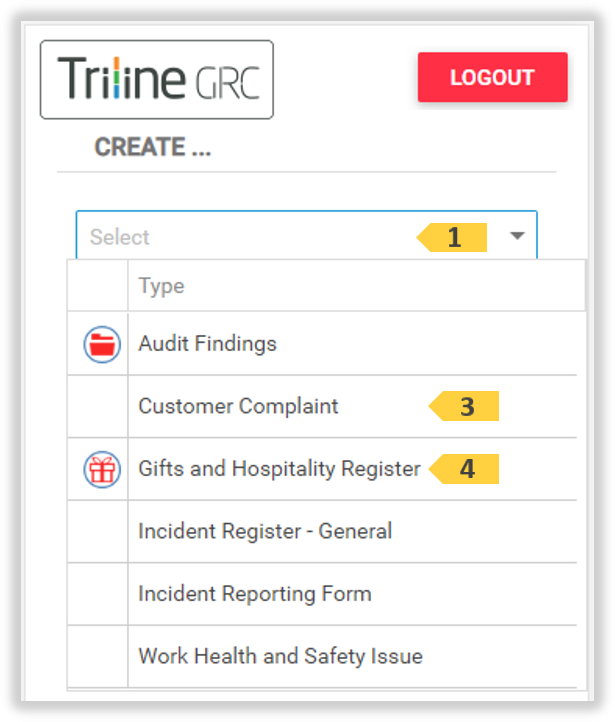
Click Select1 to display the list of Events and Registers that may be created and then click the Event or Register for which you wish to record a new entry. If you selected an Event, follow the Reporting an Event instructions. If you selected a Register, follow the Reporting a Register instructions.
Or, click through to the Main Website (full browser version) 2 of TriLine GRC. In this case, Portal users will see the web version of the Portal, and TriLine GRC position users will see the full web version of TriLine GRC. The user will then need to logout and log back in if they want to return to the mobile version.
Click the icon to Logout and close the Mobile Portal.
Reporting an Event
Click Select1.
Click an Event 3. (In general, most all Registers have icons and Events never have icons.)
Create a New Event record by completing the following five steps:
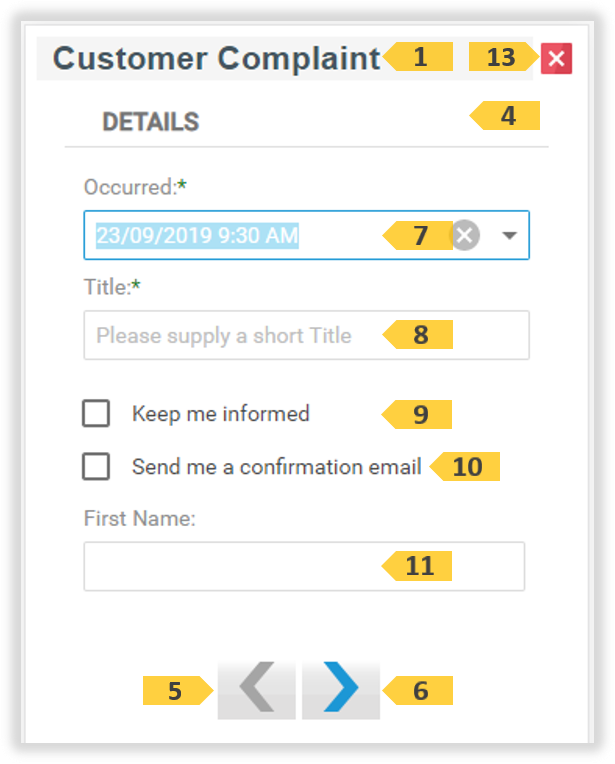
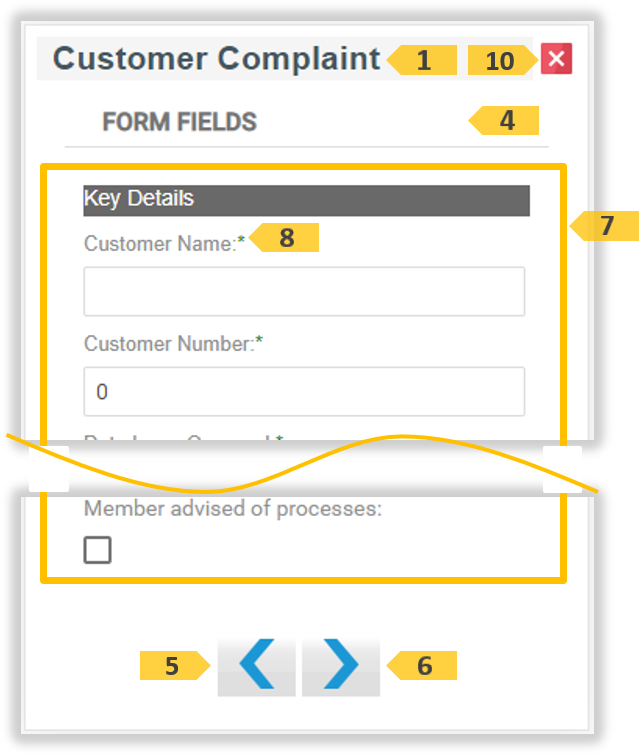
The Form page appears (step 2 of 5). Enter information in each field of the Form 7 as required. Note: Any field marked with an asterisk *8 is a mandatory field and a value must entered here.
After completing the Form, click the Next icon 6 to proceed to Step 3.
The Other Information page appears (step 3 of 5). If instructed, use this optional step to further describe or add other information about the Event. If provided, follow the instructions in this field 8.
Click the Next icon 6 to proceed to Step 4.
Note this field is strictly a text field. Screen shots and images can now be added as attachments on the next step.
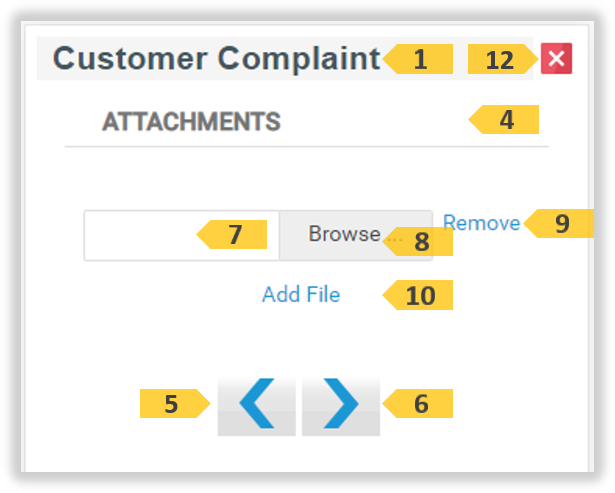
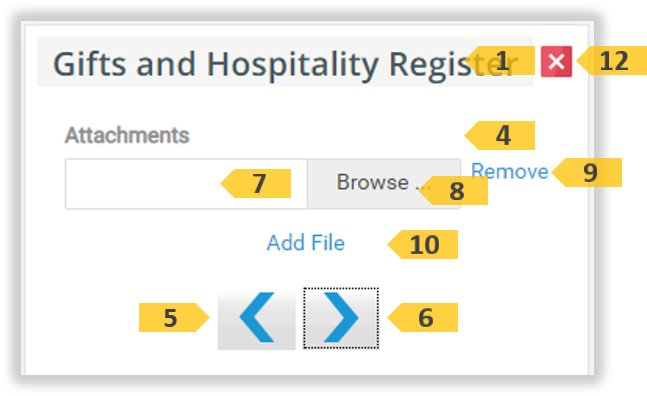
The Attachments page appears (step 4 of 5). To add attachments to your Event, click the Browse... button 8 to browse for an attachment. Mobile devices will give many options including taking pictures and recording audio, in addition to files on your device. When selecting files, a window will open, navigate and choose a file to attach. The file name is displayed in the field 7.
Add more attachments by clicking the Add File link 10 and repeating the previous instruction (1).
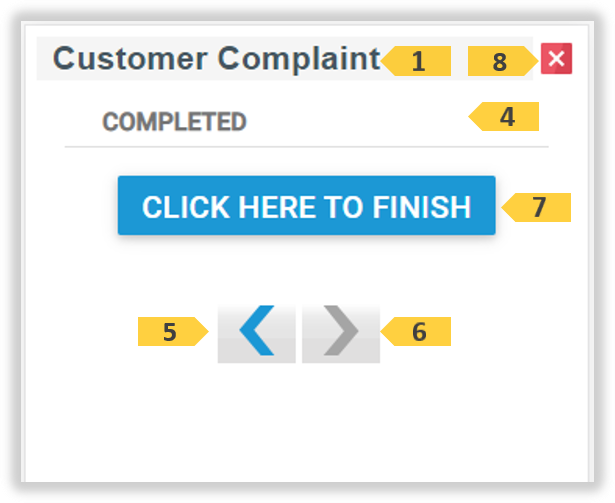
The final page appears (step 5 of 5). If required, click the Previous icons 5 to review your Event information prior to finishing. Use the Next icons 6 to return to this step.
Click CLICK HERE TO FINISH7 to create the new Event
If there are no errors, you will be returned to the Create page with a message that your Event was successfully created. If there is errors, they will be display in a list. Use the Previous icon 5 to return to the fields that need correcting. Once done, click Next icons 6 to return here and re-attempt to finish creating the Event. Repeat until all errors are corrected.
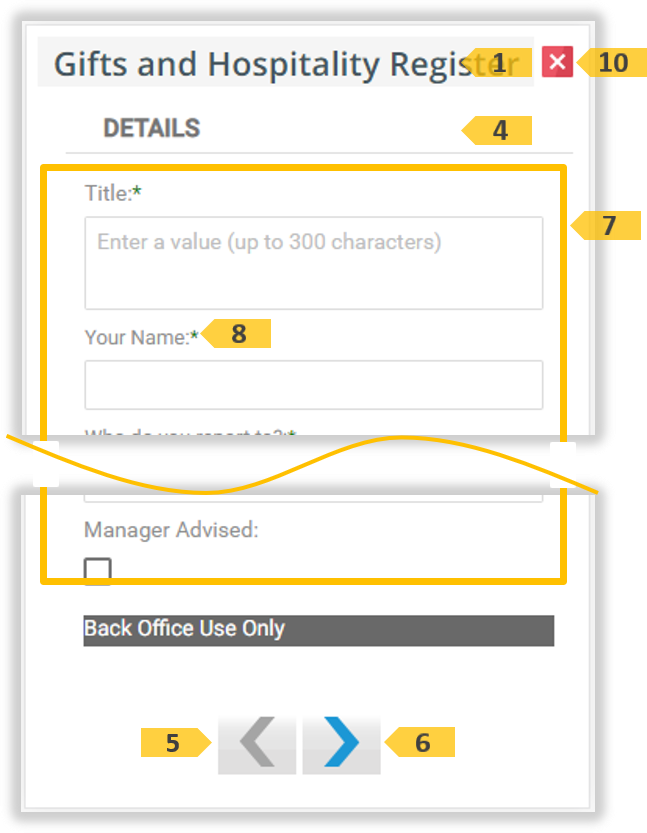
After Selecting a Register, the Form page appears (step 1 of 3). Fill in Form fields 7 as required. Note: Any field marked with an asterisk *8 is a mandatory field and is required to have a value.
The Attachment page appears (step 2 of 3). To add attachments to your Register, click the Browse... button 8 to browse for an attachment. Mobile devices will give many options including taking pictures and recording audio, in addition to files on your device. When selecting files, a window will open, navigate and choose a file to attach. The file name is displayed in the field 7.
Add more attachments by clicking the Add File link 10 and repeating the previous instruction (1).
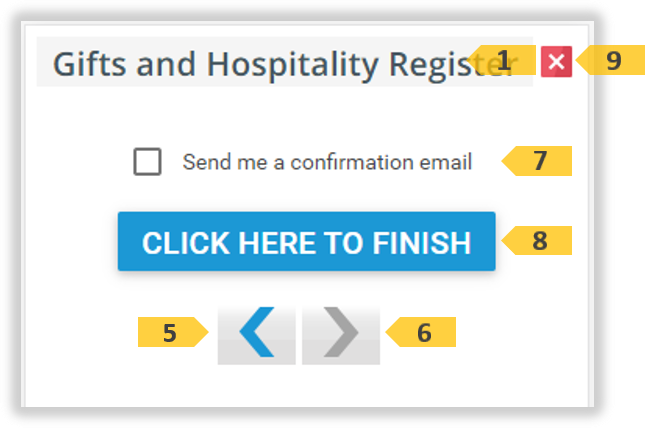
The final page appears (step 3 of 3). Check Send me a confirmation email5 to receive a notification email confirming the creation of this Register record.
If required, click the Previous icons 5 to review your Register information prior to submitting. Use the Next icons 6 to return to this step.
Click Click here to finish8 to record the new Register
If there are no errors, you will be returned to the Create page with a message that your Register was successfully created. If there is errors, they will be display in a list. Use the Previous icon 5 to return to the fields that need correcting. Once done, click Next icons 6 to return here and re-attempt to finish. Repeat until all errors are corrected.