Triage PRO task can only be scheduled adhoc (one off); there are no cyclic Triage PRO tasks.
There are two types of Triage PRO tasks; one is a record Status Update and, one is a standard task. The question to be asked of Triage PRO email is “is an Activity required as a consequence of the content of this email”. This question can be answered in the initial task through the selection of the record Status. A Closed status indicating, no more is to be done; and any other Status, the opposite.
Triage PRO tasks may only be done by a single Actioned By Position.
A Triage PRO task can be created automatically during Processing. Selecting an Actioned By in a rule will cause the Task to generate when the Processing has found matching search criteria of this rule.
The Update Status Task will display the current Triage PRO record Status. If a different Status is selected, this new Status will be applied to the Triage PRO record on completion of this task.
A task is made of these main elements:
the details of the instruction or action required,
the contents of the Triage PRO email and its attachments,
the schedule, including the Due Date, the first Reminder days and the second Reminder days,
the Actioned By Position.
The Escalation Position, unlike in the other module tasks, cannot be selected. Instead it is defaulted to the owner of the Triage PRO record. Hence the Triage PRO owner will be notification of any Triage PRO tasks that have not being completed by the Due Date.
A Task is an instruction or action required to be completed by a specific date. The Task can only to be Actioned By or carried out by one position.
Processing tasks are created immediately and will appear in the My Summary Current Task list of the Actioned By position immediately. Note: However notification of this New Task does not occur until the scheduled Monitor New Tasks run. So it is possible, if the timing is right, for a task to be generated and then completed, before the notification of that is sent. In this case, please ignore this notification.
For all manually created tasks, on the first reminder day, the task is generated, together with its notification, into a Current Task. The Current Task contains the instructions and the Due Date. The Current Task is generated to the Actioned By Position. The Actioned By Position (or any position with the correct security access) can now complete that Current Task.
New Task Notifications
See Note above regarding Automatic Rule Process generated tasks.
A new task notification will be sent on the Reminder Day date. If the task has a second reminder, a notification will be sent on this date. If the task is Critical, and the task is not completed on the Due Date by the Critical time, a notification will be sent on the Due Date at this time. If the task is not completed by the Due Date, a notification will be sent everyday the task is overdue until the task is complete.
Elements of a Triage PRO Task
Adding or Editing a Triage PRO Task reveals two tabs,
The Details tab contains the instruction or action required by this task.
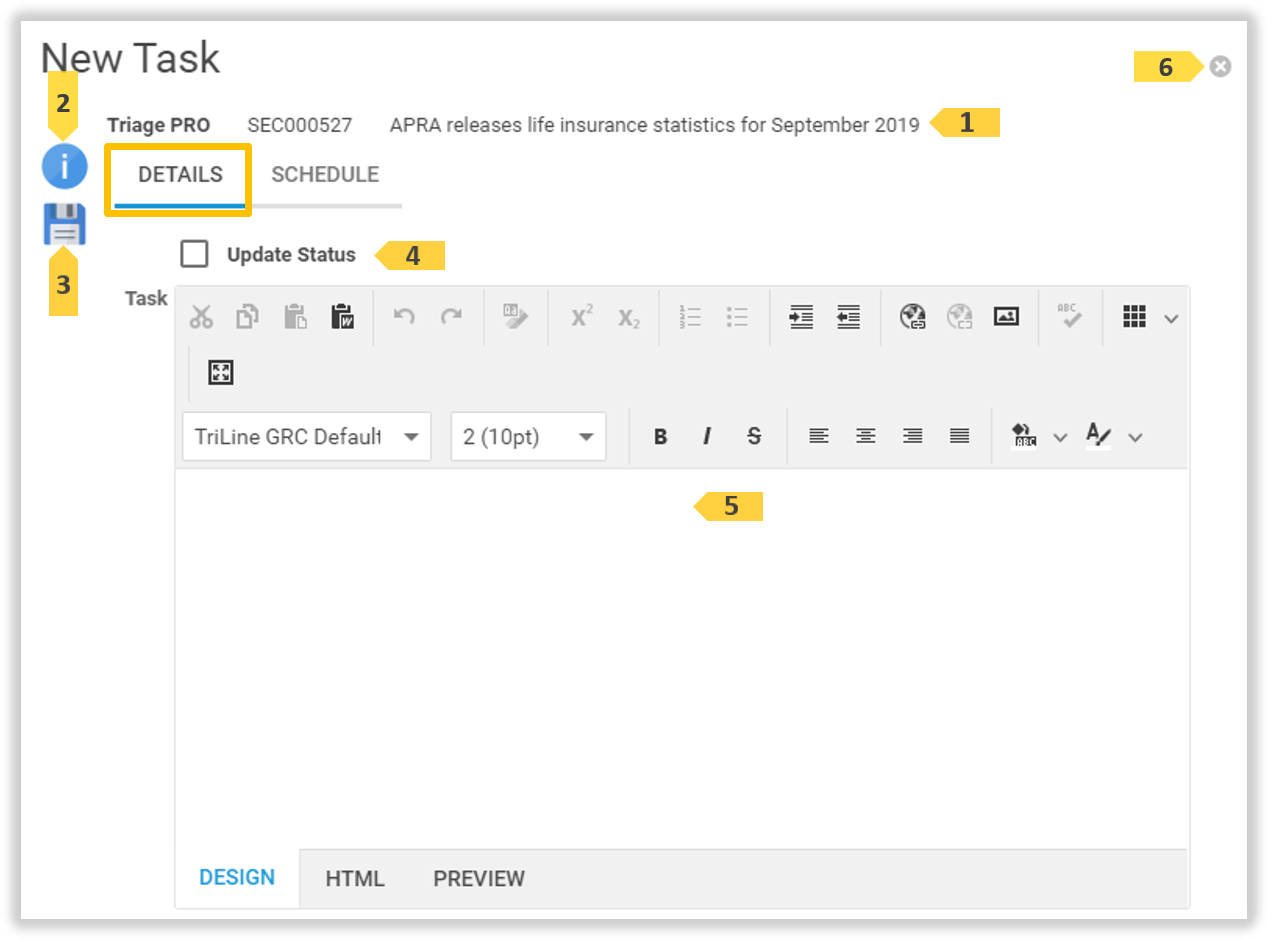
The ‘New Task Details’ tab
The Details tab elements
The Details tab elements
ID
Element
Description
1
Triage PRO number and Title
The Triage PRO record to which the new task is being added.
2
Information icon
Click the icon to show information about the fields on this tab.
3
Save icon
After entering all required information on both tabs, click this icon to save this New Task.
4
‘Update Status’ option
Tick this checkbox to set the Task as an Update Status task. The Statuses that the owning Triage PRO record can be changed to, will appear on the generated task, when this checkbox is ticked.
5
‘Task’ description field
Use the Text Editor to detail the steps necessary to complete the Task. These details are emailed to the ‘Actioned By’ Position, and are also displayed in the My Summary Current Tasks tab, when a Task is generated.
6
Close icon
Click this icon to close and not save this New Task.
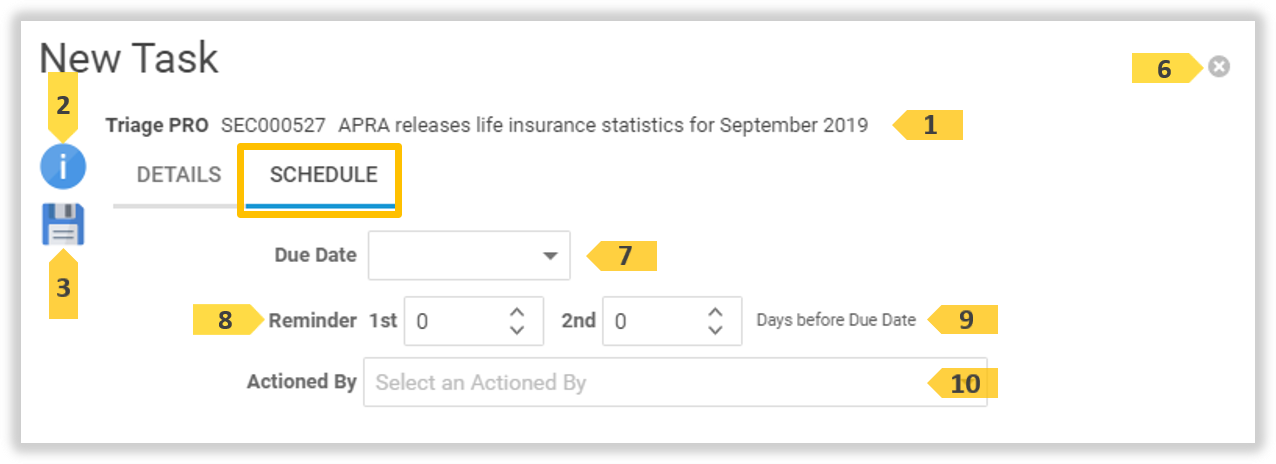
The Schedule tab
The Schedule tab contains the schedule, the frequency, and the Actioned By.
The ‘New Task Schedule’ tab
The Schedule tab elements
ID
Element
Description
7
‘Next Due’ date picker
Use the Date/Time Selector to set the date on which the Task must be completed by.
8
‘Reminder 1st’ field
Is the number of days before the Task due date that the Task will be generated and the ‘Actioned By’ Position notified. If the day the Task is be be generated falls on a non-business day, the task will instead be generated on the first prior business day. This is the day the task will appear in the ‘Actioned By’ Current Tasks list. This is also the day the ‘Actioned By’ position will receive a notification email containing the Task details and when the Task is Due.
9
‘Reminder 2nd’ field
For Tasks with a long lead time (i.e. 1st Reminder is set to a high number of days), set a lower number of days in the ‘2nd Reminder’ field so that an additional email notification is sent to the ‘Actioned By’ Position before the due date. The same non-working day principle as 1st Reminder applies to this 2nd Reminder.
Tip: Set this field to zero if you don’t want a 2nd Reminder sent for this Task.
15
‘Actioned By’ field
The Position that this task will be generated for on the 1st Reminder date.
The New Task window displays. Enter the required fields on the Details tab tab. Click the the Schedule tab and enter the required fields. Click the Save icon 1 to save this new Task. (Or, click the Cancel icon 2 to stop adding the new Task.)
The Edit Task window displays. Update the required fields on the Details and Schedule tabs. Click the Save icon 1 to save the editing. (Or, click the Cancel icon 2 to abandon the editing.)
Click the Create a copy of this Task icon 1 of the task to be copied.
The Copy Task window displays. As required, update the fields on the Details1 and Schedule tabs. Click the Save icon 2 to save the copy. (Or, click the Cancel icon 3 to abandon the copy.)
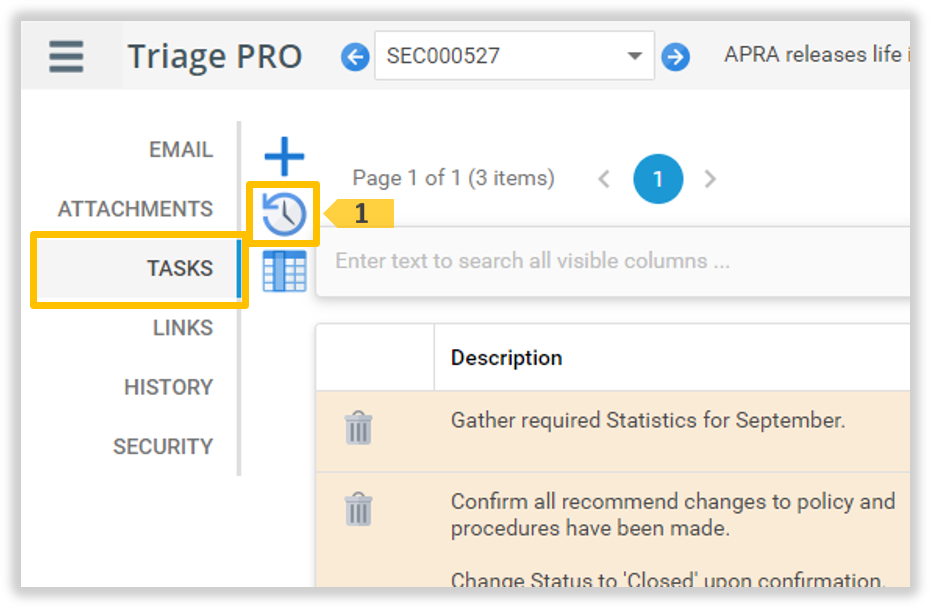
Click the Show the Task Completion History icon 1 of the record to be viewed.
The ‘Task Completion History’ window displays. The most recent completed task history record is displayed. If the ‘Due Date/Actioned By’ 1 field appears, it indicates that more one task completion history record exists for this Task. Click the ‘Due Date/Actioned By’ dropdown 1 to select the other Completed Task History records. Also click the Comments tab and the Attachments tab 2 to see that information for this History Record. If you have the correct security access, further comments can be added and removed, and attachments can be added or removed. Click the Close icon 3 when viewing is completed to close this window.
Update Task Completion History
Note: Only Positions that completed this task, or have been allocated to a Security Group with ‘Edit’ Record Security Rights can update a Completed Task History record.
The ‘Update Task Completion History’ window displays. Enter a Reason 1 for the update in the Reason field. Change the ‘Actioned On’ 2 date if required. Click the Save 4 icon to Update. Click the Cancel 5 icon to cancel the Update and close this window. Saved Updates will appear on the Comments tab. (Note:Depending on your system configuration, ‘Completed’ options may appear. Serious consideration needs to be given to ever changing this answer to ‘No’, as ‘No’ means this task will not ever be completed; it will be ‘Not Completed’.)
If required, Click the Comments tab. Click Add Comments 1 icon to add new comments.
The Add New Comment window displays. Enter a new Comment 1. Click the Save 2 icon to save this comment. (Click the Cancel 3 to cancel the save and close this window.)
To edit a Comment, click the Edit icon 1.
The Edit Comment window displays. Update the comment 1. Click the Click the Save 2 icon to save this comment.
To delete a Comment, Click the Delete 1 icon. Click OK to confirm the delete.
If required, click the Attachments tab. Drop the attachment files, or use Browse. The file(s) will remain displayed in the field before disappearing and reappearing in the Attachments list.
Click the View 1 icon to view the attachment. Click the Delete 2 to delete the attachment.
Completing a Triage PRO Current Task
My Current Tasks
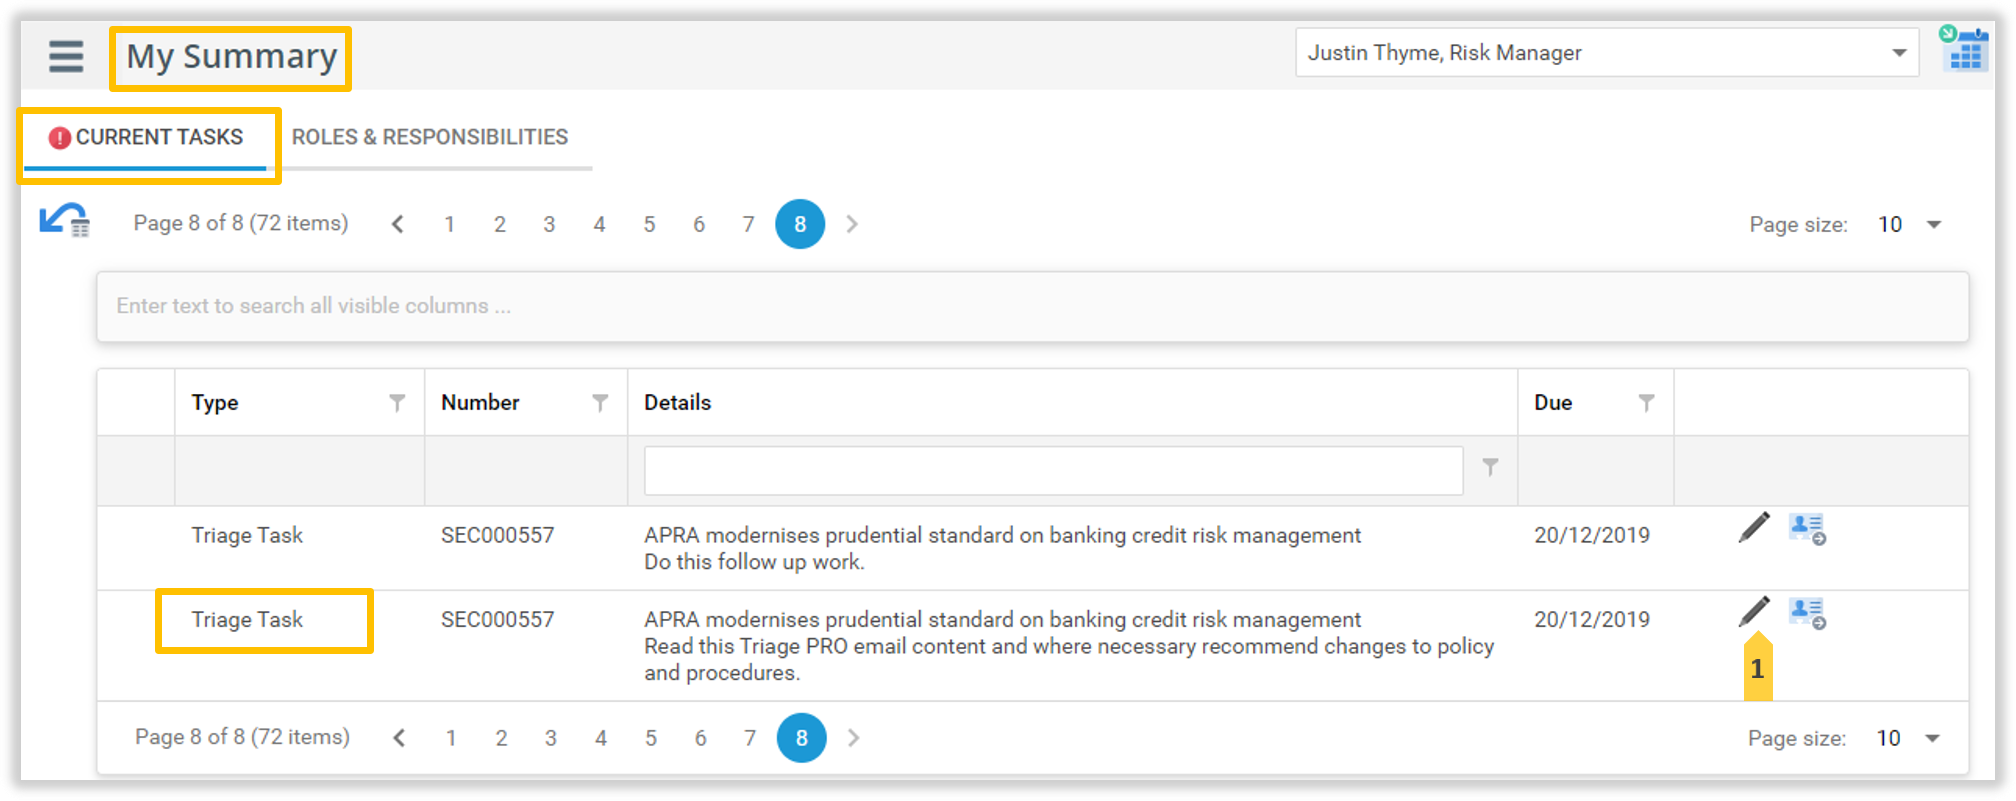
To see which tasks have been generated for you to complete, from the main menu, click the My Summary option.
If the Current Tasks tab appears, you have Current tasks you are required to complete. If this tab does not appear, you do not.
Look for, or filter by, TypeTriage Task in the Current Tasks list.
Completion Options
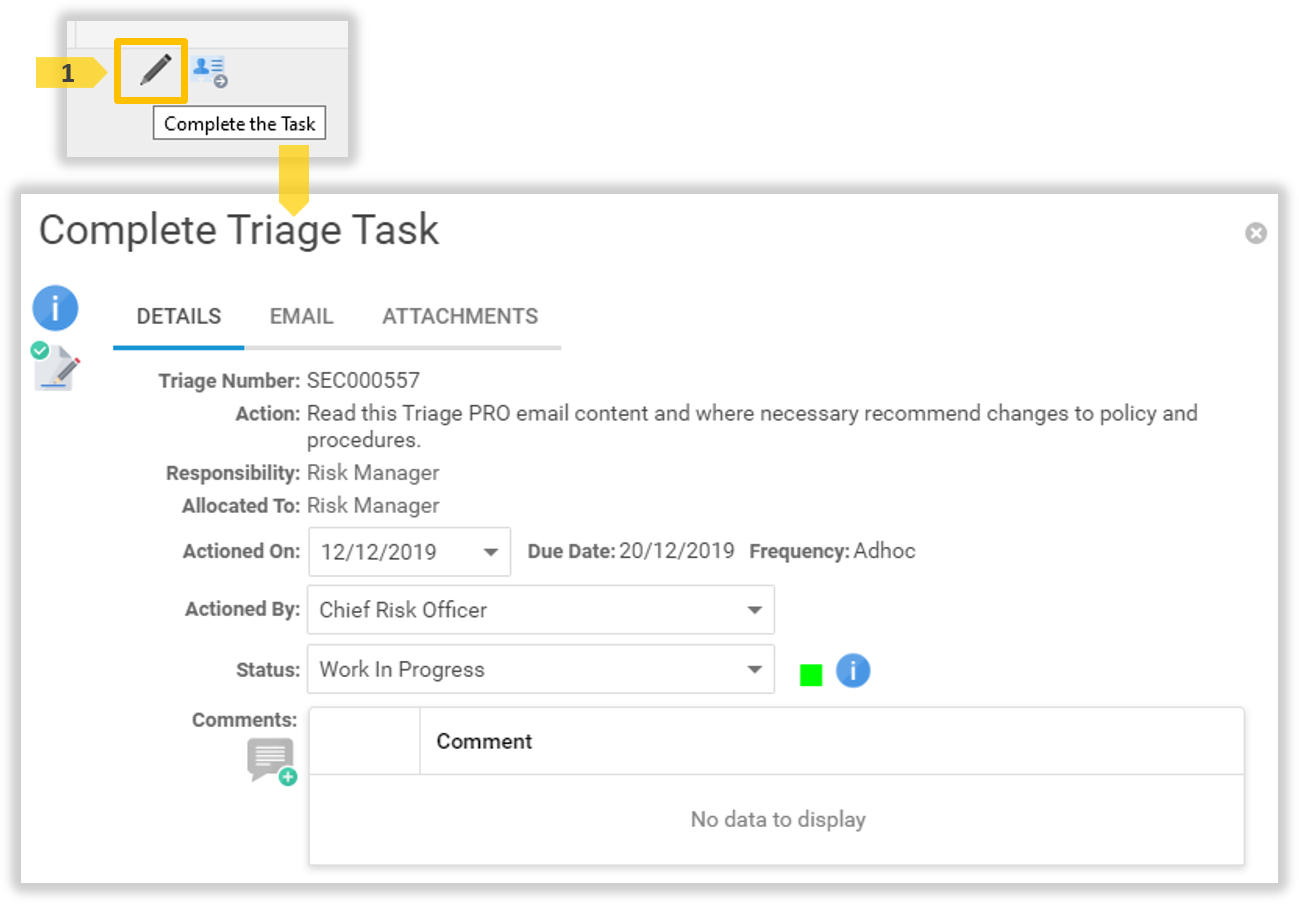
A Triage PRO task requires a comment, so clicking the pencil 1 icon complete option is the only complete option available.
Complete the task
Click the Complete the Task1 icon to display the Complete Triage Task window.
Changing the Actioned On date
If you wish to change the Actioned On date from today to another date, select the new Actioned On1 date.
Selecting a Status
If the task is an Update Status task, the Status selector will appear. Select the Status as required.
Note: On completion of this task, this Status will be applied to the Triage PRO record to become it’s new Status.
Adding a Comment
To add a comment, click the Add Comment 1 icon.
The Add Comment window displays. Enter in your text 1, then click the Save 2 icon; or click the Cancel icon to stop adding a comment.
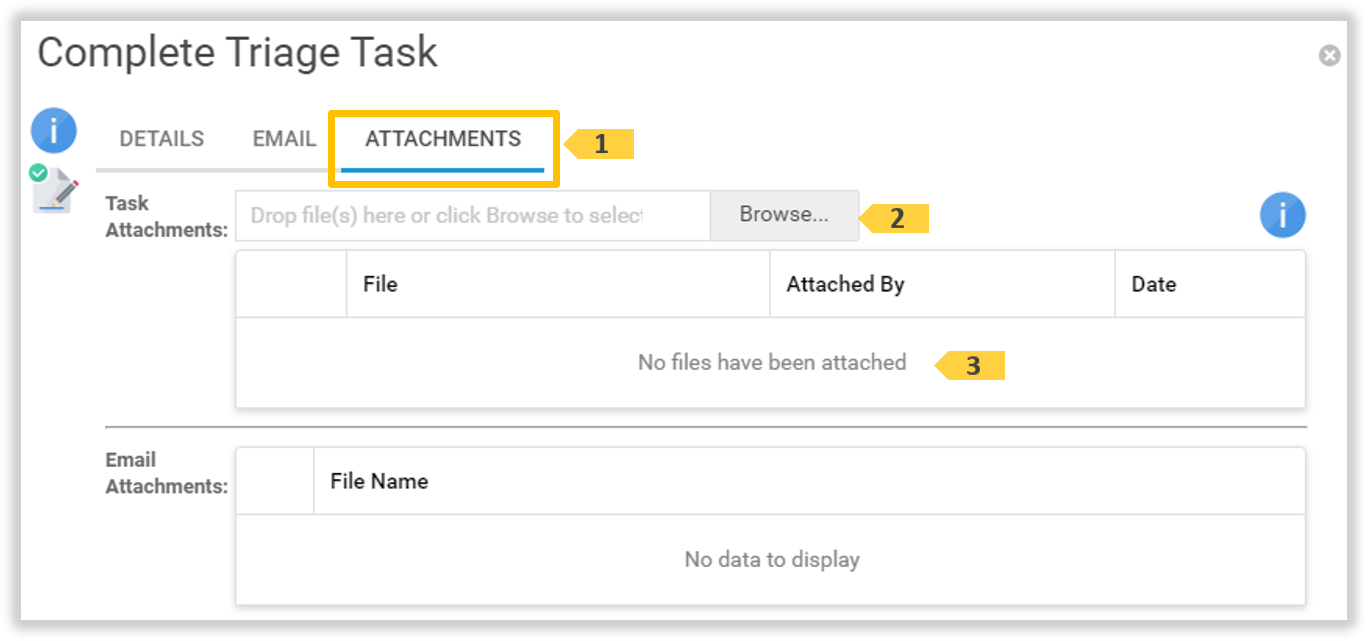
Adding an Attachment
To add an attachment, click the Attachments1 tab. Drop file(s) in the Browse field, or click Browse 2 to locate and select the file(s) you wish to attach. Files can be also be attached one at a time. After a few seconds the files will re-appear into the File attachment list 3.
Completing the task
To complete the Current Task, click the Complete Task 1 icon.
If all required information is entered correctly, the task will complete and the window will close. If an error message appears, correct the error, then reattempt clicking the Complete Task 1 icon. Repeat until all errors no longer occur.